
TGIF, friends! Are you ready to weekend? I feel like we started a day earlier because we went to our son and daughter-in-law’s house yesterday to celebrate my husband and our grandson’s birthdays! Come see how we decorated for the festivities and how to make a balloon garland!
Because this was our grandson’s first birthday, we all wanted to do something extra special in order to celebrate. And because he was born on my husband’s 60th birthday last year, from here on out it will forever be a double celebration! (The blessed day, if you recall.) For part of the decorations, I wanted to make a balloon garland. So, I borrowed this handy, dandy electric balloon pump from a sweet friend. If you are going to make a balloon garland, this little pig is the ticket!

In addition to the balloon pump, it’s helpful to buy some balloon tape strips. I found this one online got $9.99 for a 50 foot roll. Each roll is more than enough to make several long garlands. Initially I wasn’t sure how long we would make the garland so I didn’t cut the tape until the end.

Here’s what the tape looks like unrolled. There are pre-fabricated holes about every inch apart. Once the balloons are inflated and tied, you simply pull the end of the balloon with the knot through the holes. I found that skipping a hole or two in between the balloons works best, especially if you blow up the balloons pretty full.

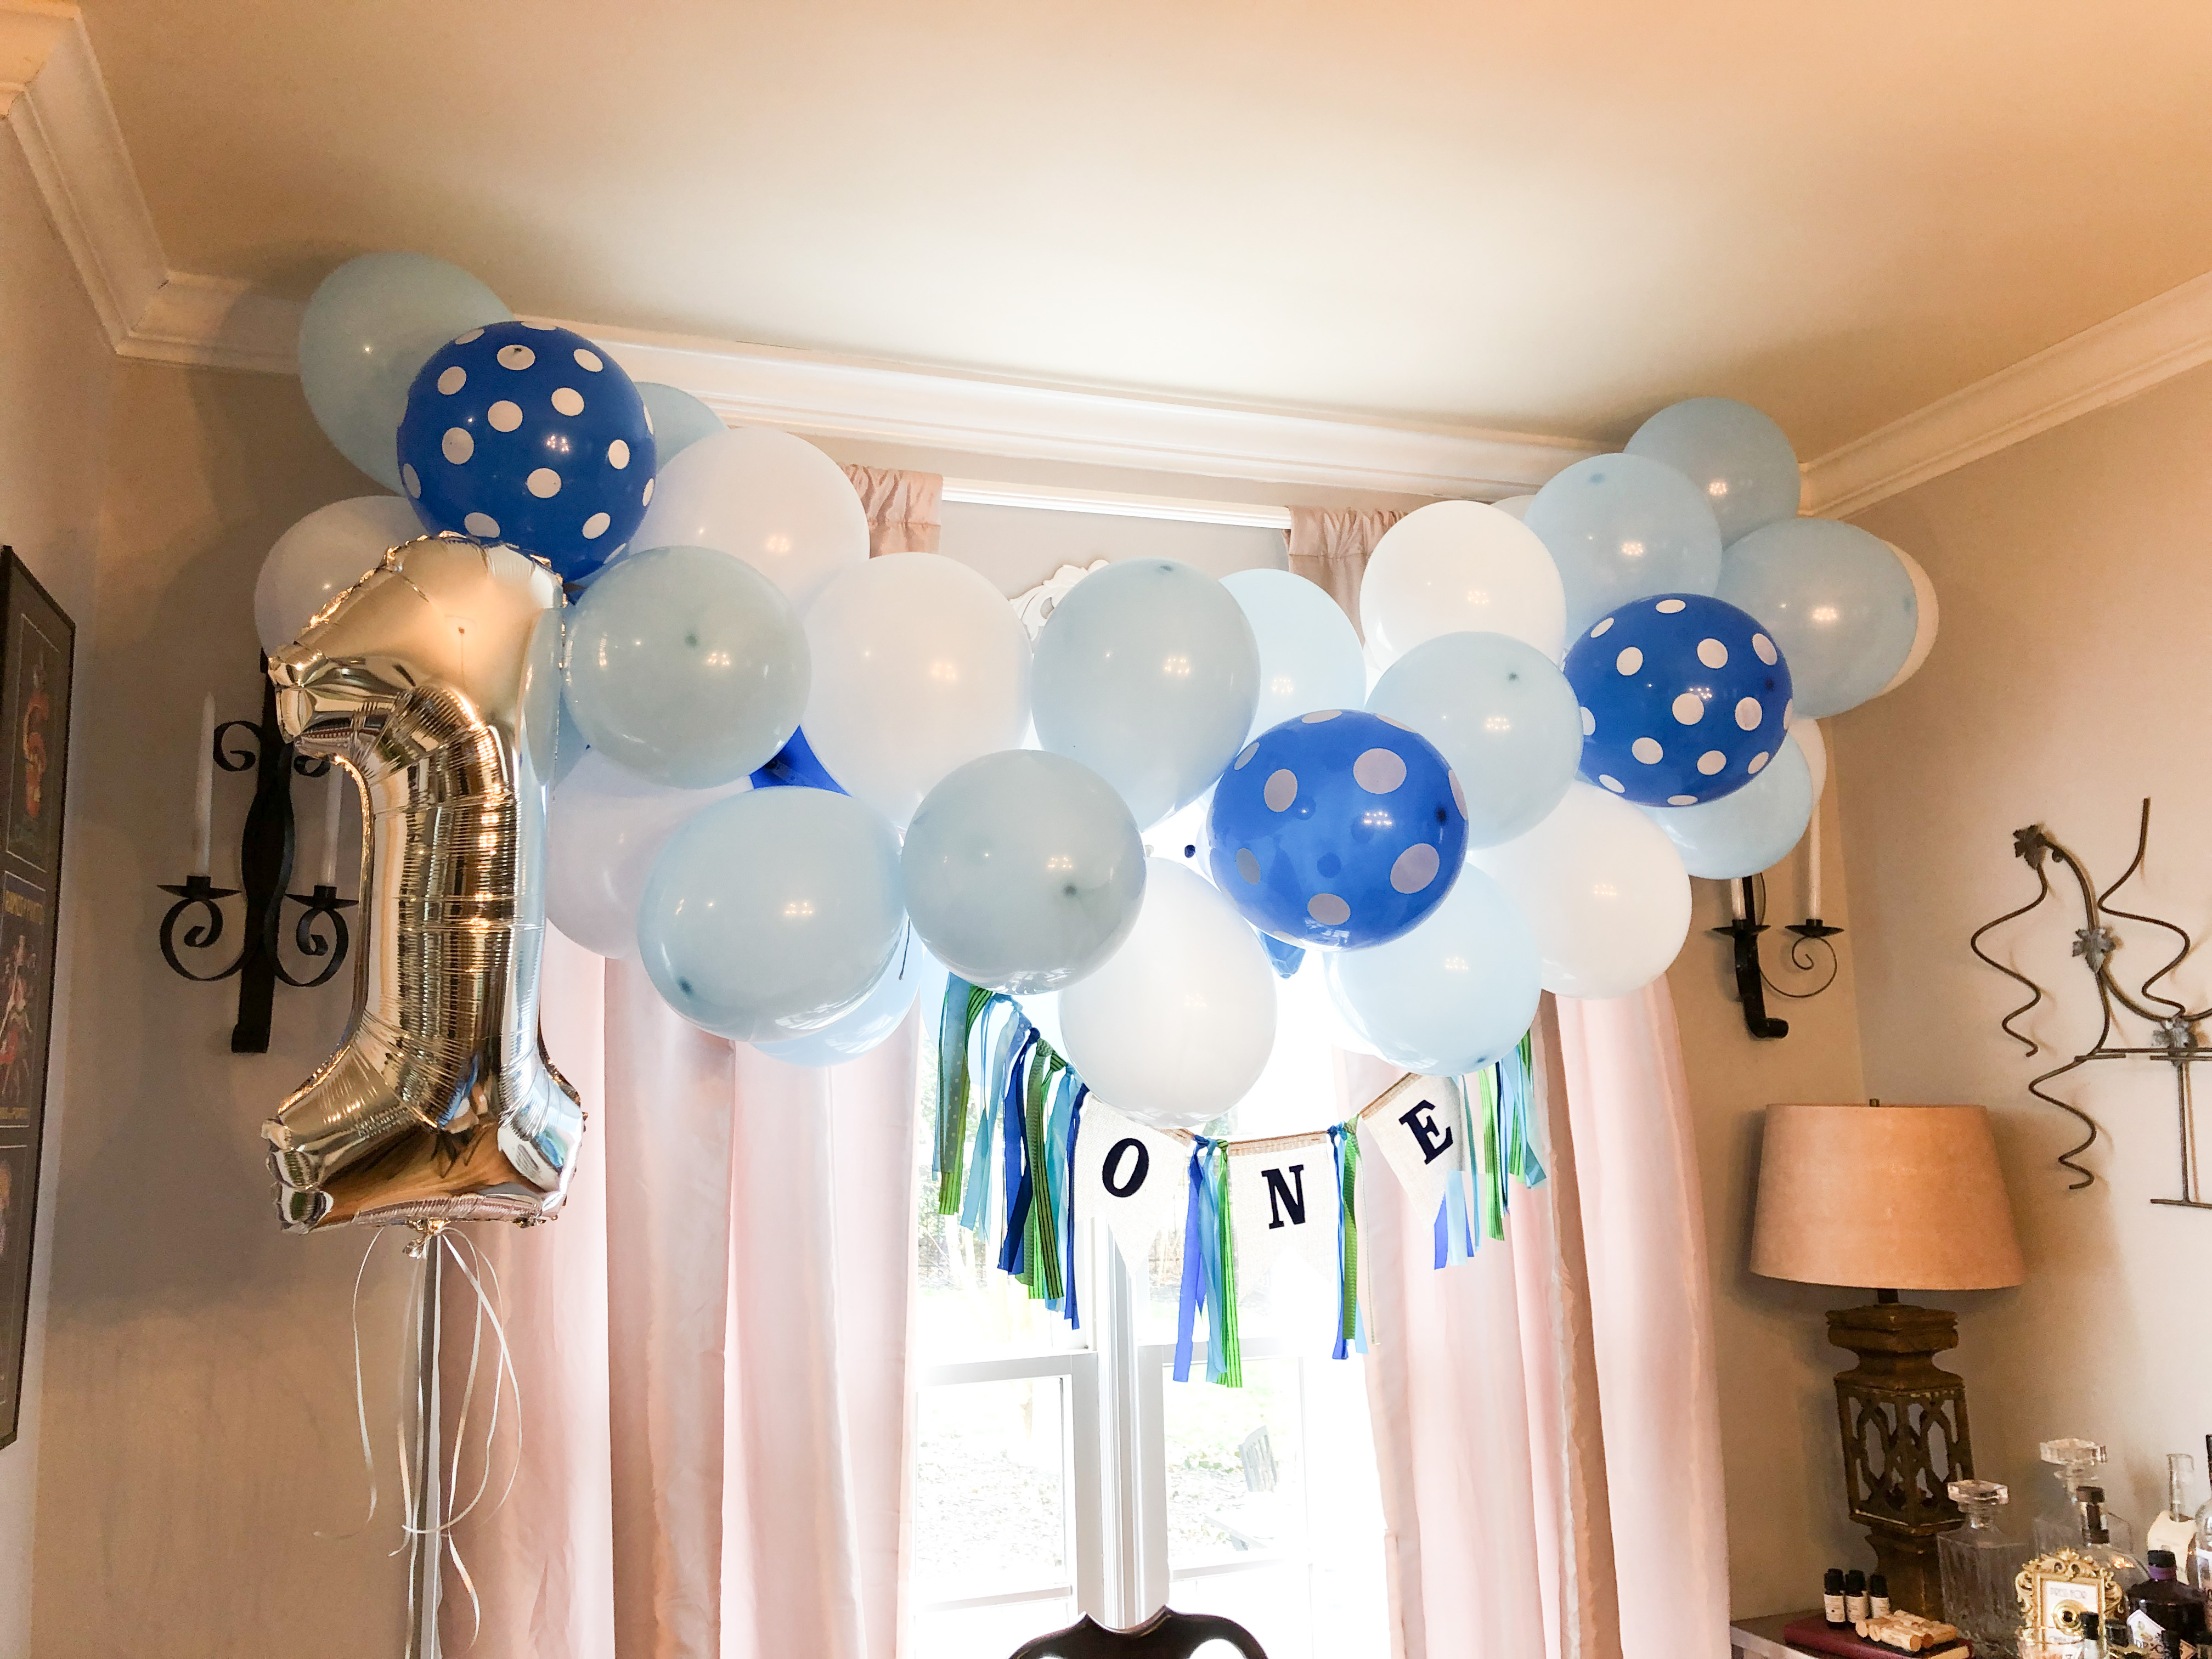
If possible, it’s nice to have one person blowing up and tying the balloons and another assembling the garland. But, you can do it alone if you must. In our case, my son blew up the balloons and I assembled the garland. We chose white, pale blue and a few polka dot accent balloons to go with the blue birthday theme. I tried to space out the colors evenly, but there really is no right or wrong way to assemble the garland. And here’s a tip, when you add the first balloon to the tape, leave a few empty holes on each end so you can tie a piece of ribbon to attach the garland where you want. As you go along, be sure to alternate the balloons on the front and back of the tape for a nice full effect. When the garland was finished, (and we ran out of balloons), we tied each end of the garland to the curtain rod so it would swag down in the middle.

We added the “ONE” banner (found on Amazon) in the center and tied it to a few of the empty tape holes in the balloon tape strip.

We added a few balloons and some paper pom-poms to the chandelier for fun. And a table full of gifts for the birthday boys rounded out the decorations! (Well, most of the gifts were for the birthday baby! You can probably guess which ones!)

We figure we used about 50 balloons to make this garland. Again, it’s very helpful to have an extra set of hands!

My son and I put together this garland in about 30 minutes. The electric pump makes the entire process so much quicker and easier! I think the balloon garland turned out so cute! And here are the birthday boys cutting up and having fun!

I liked using the pig-shaped electric balloon pump so well, that I just purchased one for myself on Amazon. It comes with extra balloon tape strips, glue dots and a balloon tie tool for $19.99 and free delivery on Prime. (Balloons are sold separately.) Now that I’ve made a few of these balloon garlands, I think I have the hang of it now. If you plan on making a balloon garland, this little electric pump is a great investment! NOTE: The pump only inflates the balloons with air, not helium or hydrogen.
Well, it was a wonderful and memorable first birthday for our grandson and we are so thrilled to have been able to celebrate together. A special thanks to our sweet son and daughter-in-law for making the event extra special, not only for their precious son, but for my husband and me as well! Let’s start planning for next year!
I hope you have a wonderful weekend and enjoy the Super Bowl! I hope your favorite team wins! Much love, Dell