
Happy Throw Back Thursday! Since I am in a perpetual state of chandelier dreaming, I was thinking about this beauty I reinvented at our last house. In case you missed it, come see the funky chandelier makeover!
When we put our former house on the market, we excluded from the sale some of my favorite chandeliers. In hind sight, we should have removed them prior to putting the house on the market. It would have saved me a lot of time, money and headaches. The buyers insisted we replace the chandeliers with “lighting that is in keeping with the style and quality of the home”. Easier said than done. You know me, my chandeliers are always a bargain. So, I put on my thinking cap and came up with a few unique chandeliers to replace the ones I took. I had this funky yellow chandelier in my treasure room. It’s large and interesting. I knew it would be a great dining room chandelier replacement!

I’ve had this chandelier in my stash for some time. And although I loved the funkiness of the yellow/gold with the amber crystals, I knew it was not everyone’s cup of tea. It needed a little make over.

So, I removed the crystals and beads and hung it outside from a tree branch. By the way, this is my favorite way to paint a chandelier. This way, it’s easy to paint all angles of the fixture, including underneath without handling the fixture and messing up the paint before it has a chance to dry.

I decided to paint the entire chandelier black, including the candle sleeves.

I painted the entire fixture with a few light coats of semi-gloss black spray paint. Once dry, I rubbed Antique Gold Rub ‘n Buff over most of the black areas with a small dry brush. I painted all of the areas expect for the sleeves. I decided to leave them black for contrast. Here’s how the fixture looked after the dry brush coat of Rub ‘n Buff. Better, right?


And a close up of one of the arms. You can still see the black paint peeking through giving it the look of true gold leaf.

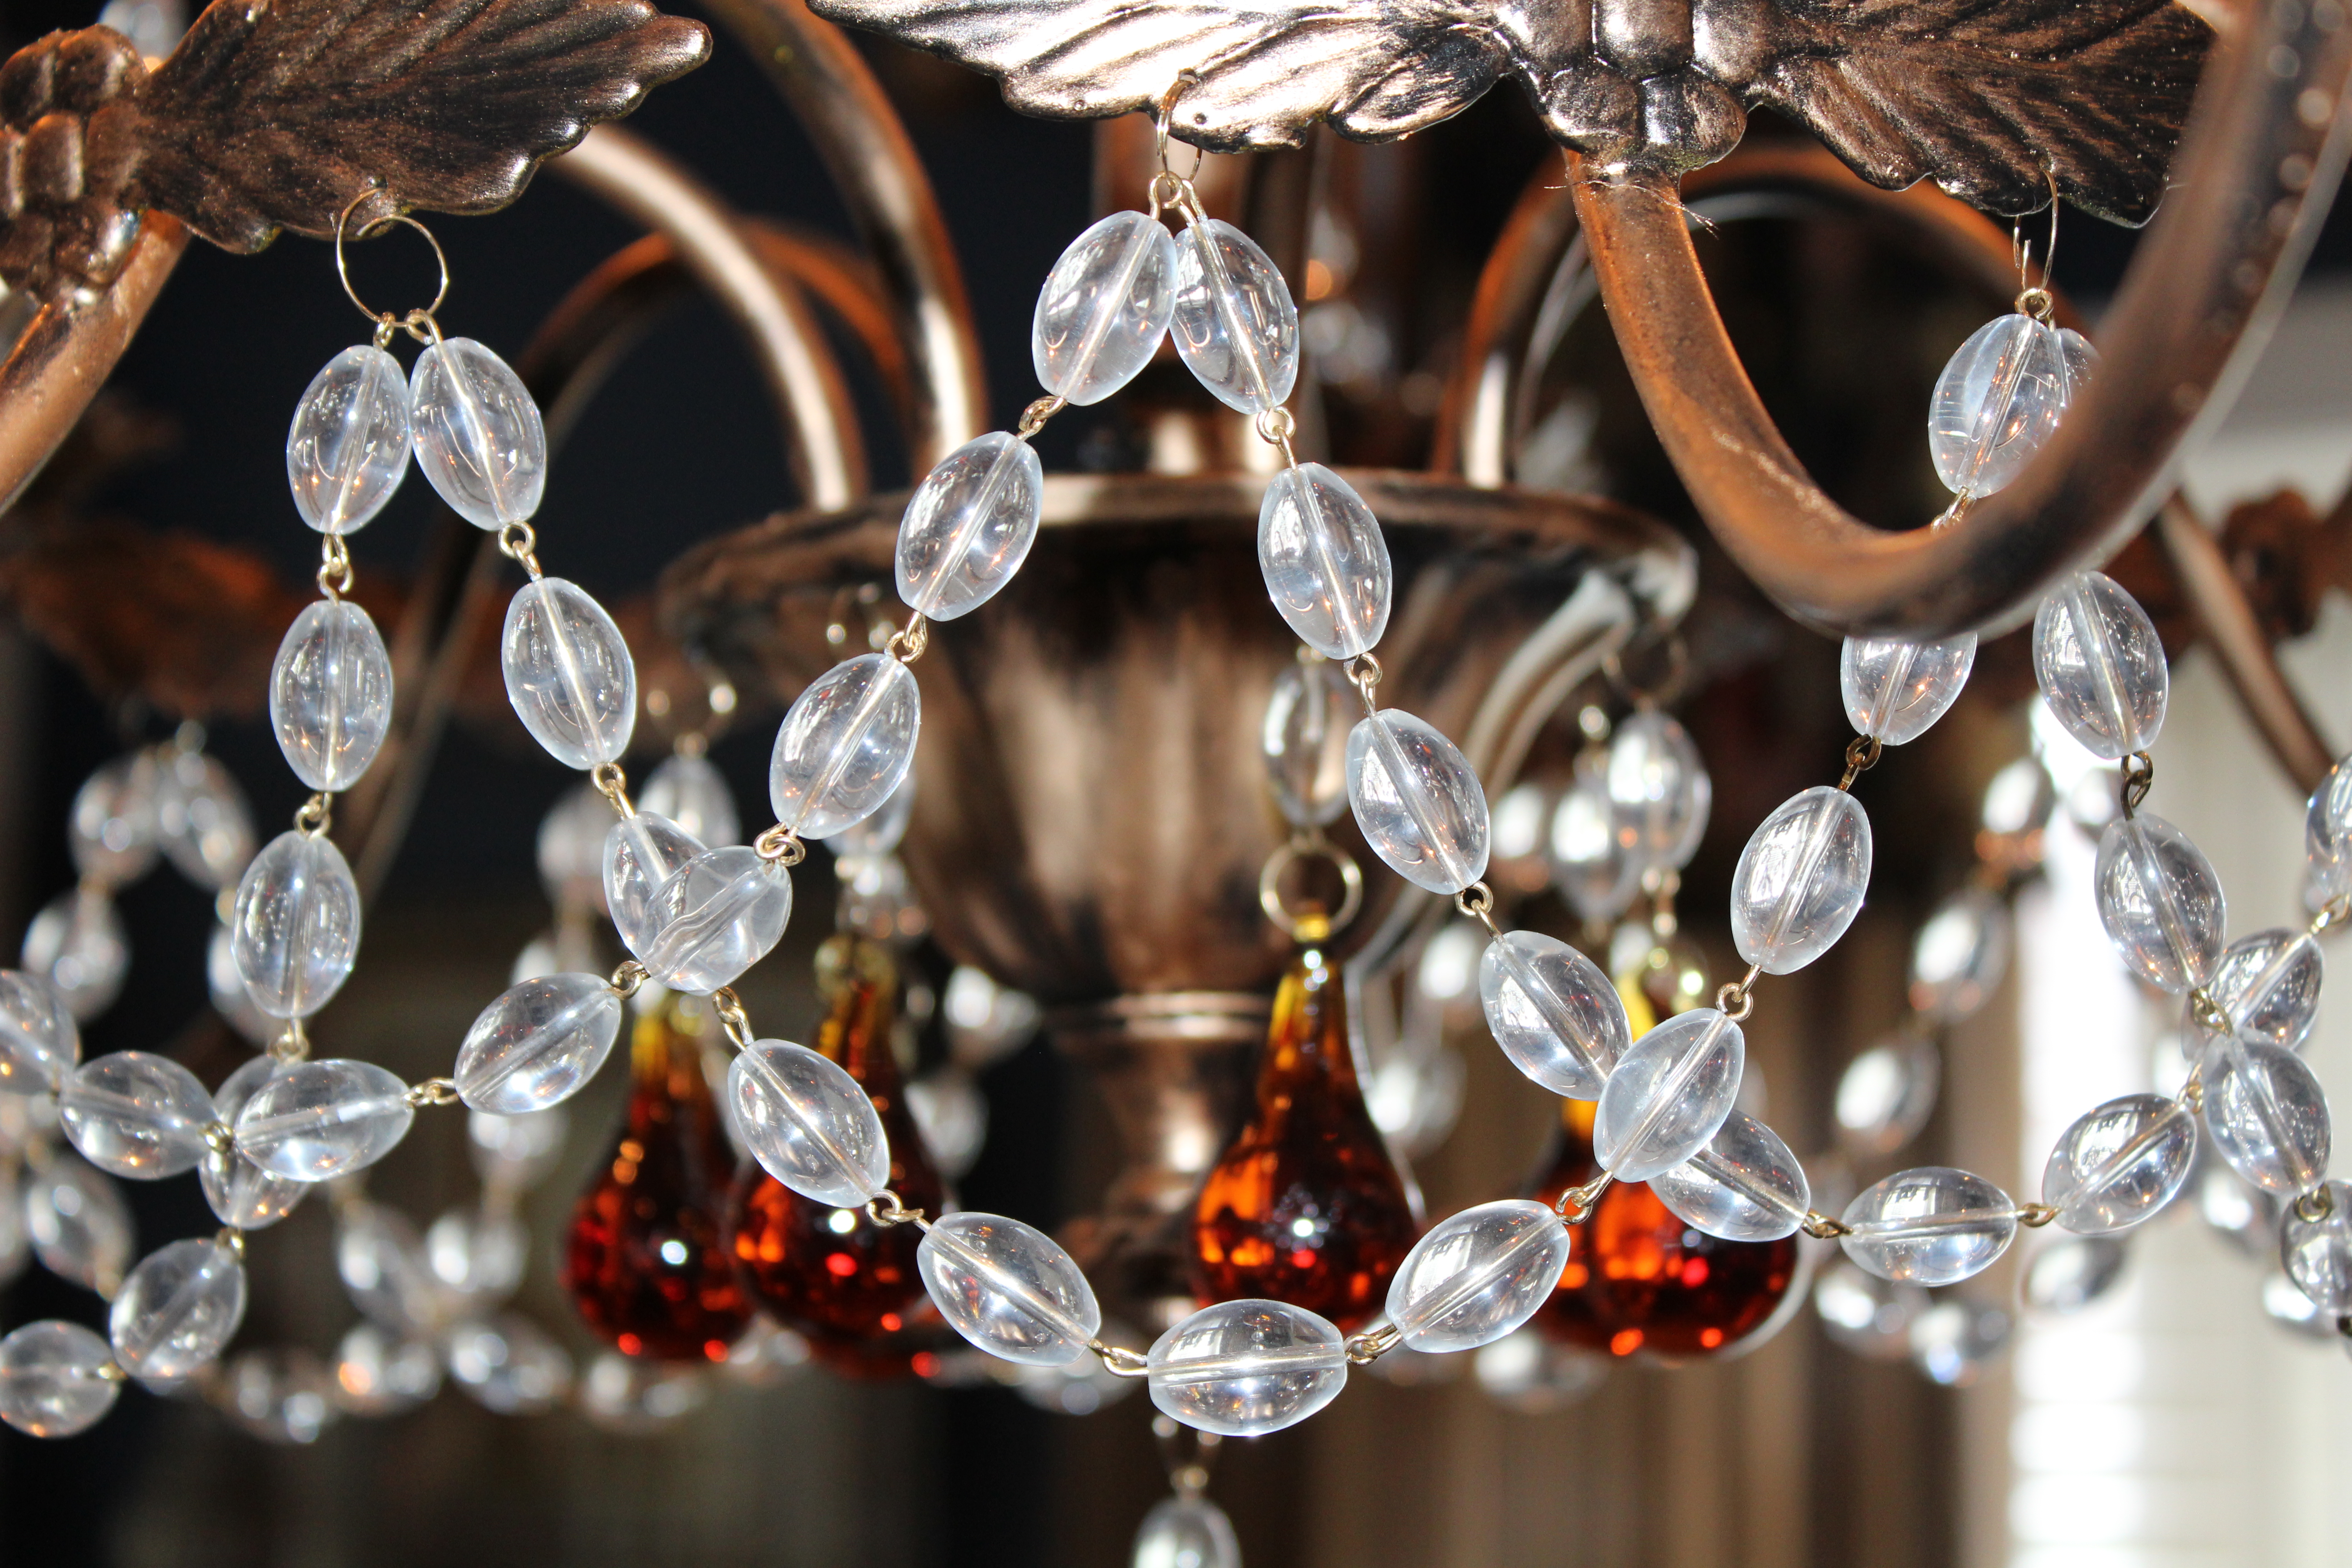
Then I added the crystals and beads close to their original formation.

Here’s a close up of the beads and crystals. Isn’t this a fun chandelier?


And here it is in the dining room! I’m telling you, it was hard to leave this one behind.

And more of the sparkly beauty of the beads and amber crystals.


For the cost of the original fixture, a bit of paint, and elbow grease, I was able to transform this chandelier into an elegant, dining room worthy chandelier. Definitely in style and keeping with the former lovely house.


I have a few more chandeliers in my stash awaiting make-overs and in some instances, a place to put them. So, the musical light fixture game continues! I bought two matching chandeliers last year and had them put on plugs. We hung them from a large double tree for our son’s engagement party. Soon, they are making a cameo appearance at my niece’s wedding. Then they will hang permanently in our Butler’s Pantry. Now all we’ll need is a Butler! LOL.


Thank you for stopping by today! I hope you have a wonderful day. Let’s chat again soon? xo Dell