
Happy Monday, my friends! I hope you had a wonderful weekend! We are so, so busy around here and our lake house with project after project. I’ll be sure to share all of them with you as we move along, but meanwhile come see my Restoration Hardware chandelier look-alike!!
Who else LOVES Restoration Hardware chandeliers? I do, but their prices are really high! About a year ago, I scored one for our bedroom on Facebook Marketplace for ½ the cost, but it was still a splurge. I’d been squirreling away money for several months in search of just the right chandelier for our master bedroom. So, when I found this one, I had the money saved so I could pay cash to the seller. (I still glance up at it every time I enter the room.)

After further study of RH’s most popular crystal chandeliers, I found that most had the following:
1-A brass base chandelier
2-Glass bobeches with crystals (a cup or bowl below the candle to hold crystals.)
3-White plastic candle covers with white drips
4-Tons of crystals
5-Matching fancy-tip light bulbs (like so, below)

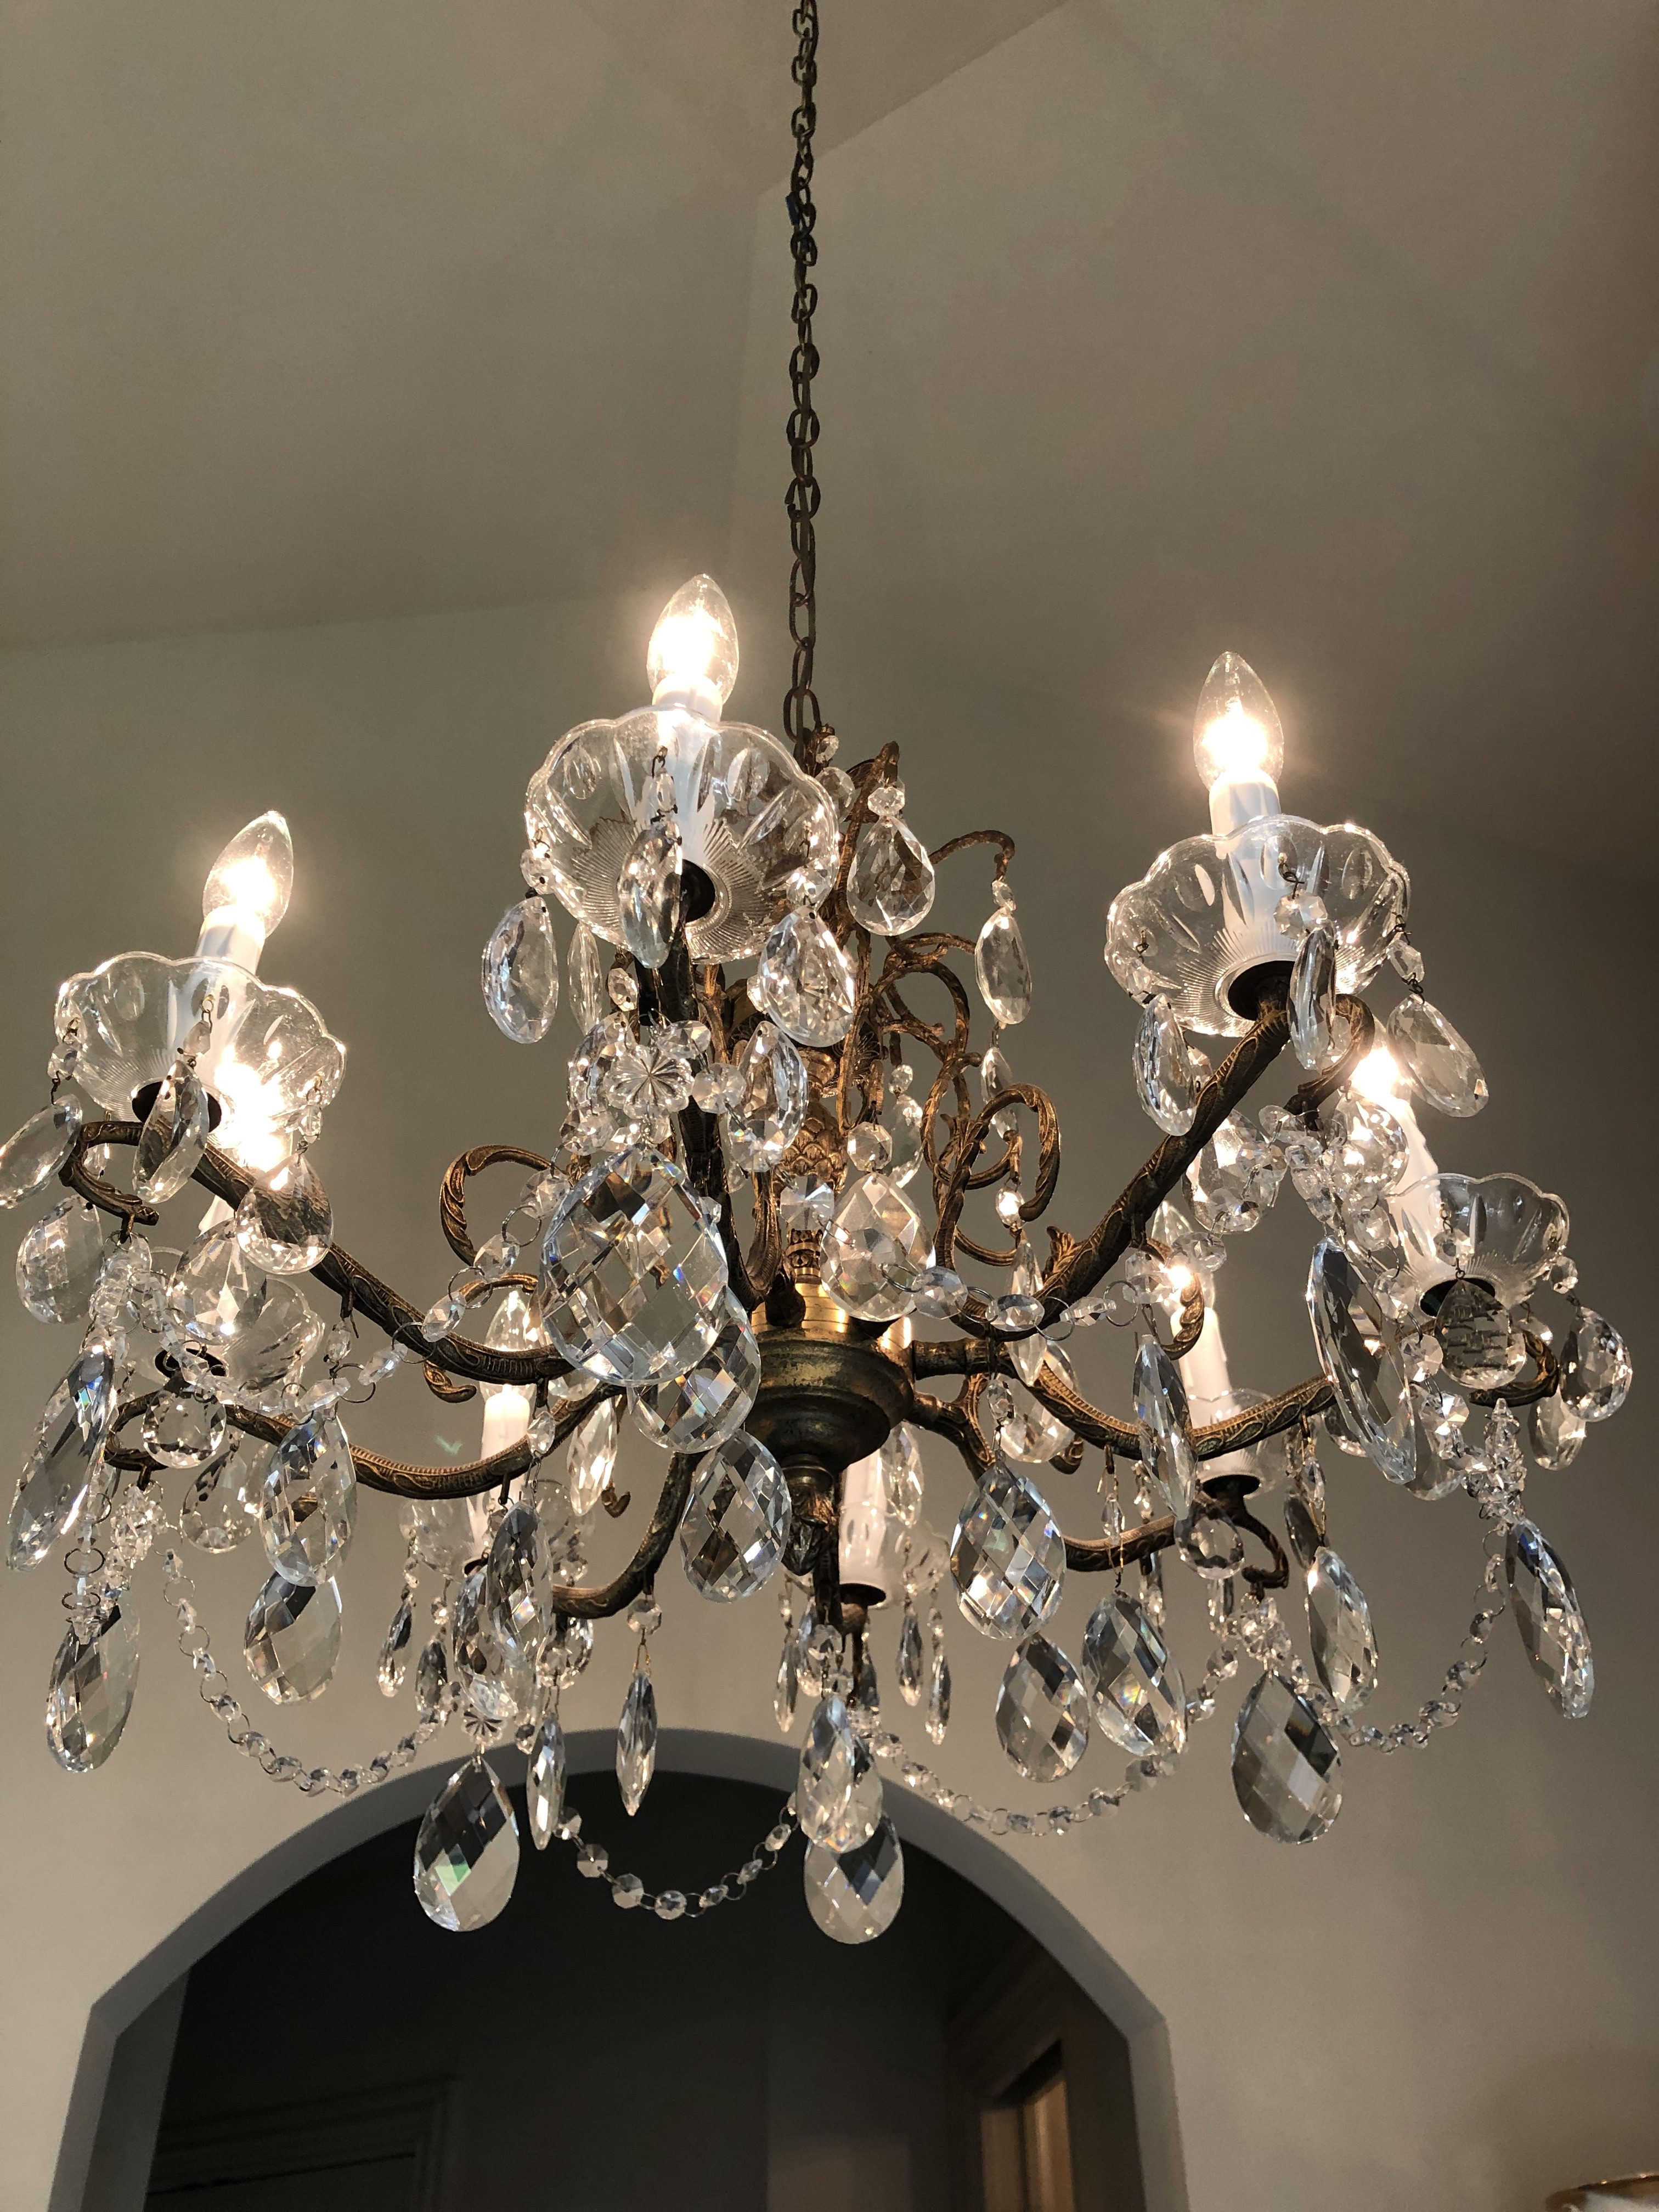
So, I already had this vintage chandelier in our master bathroom. Now to doctor it up to mimic a Restoration Hardware look-alike with a few simple changes!

My chandelier already had these glass crystal bobeches so I just added larger crystals around each glass bowl.

When I purchased the chandelier it had antique looking candle covers. They were fine, but in order to update the chandelier into my RH vision, I ordered a set of 8, white candle covers w/white drips. They are 3 ½ inches tall and are from chandelier parts.com. The covers are around $3 each. You can see the difference between the old covers and the new. To me the white ones look crisp and fresh!


There were already tons of crystals so I left most of them as-is. I replaced 8 of the large crystals directly below each bobeche with a larger crystal and a rosette for a little extra bling. (shown on the right) Not a huge difference, but more is more in my opinion.


I replaced the mis-matched light bulbs with matching 25 watt bulbs. I didn’t have any of the fancy-tip bulbs in my stash, so I just used regular candelabra-based bulbs. (It drives me crazy when the light bulbs don’t match, or one is burned out. Don’t ask me why?) This is how the chandelier now looks. While I was changing out the parts, I took the opportunity to clean all of the crystals and bobeches with Sparkle Plenty crystal cleaner. It’s amazing how quickly they get dirty in a bathroom!

While it’s not a HUGE difference, I love the subtle changes. Plus the fact that the crystals are clean, the entire chandelier has an extra sparkle and shine!

Sometimes a few simple changes and a good cleaning is all it takes for me to fall in love with something again. Now the only thing left to do is put this baby on a dimmer switch! Soon, I hope. Most people that come to our house don’t get a chance to see our bedroom or bathroom, but my husband and I get to enjoy it everyday. It’s our own little spa-like getaway and to me, a crystal chandelier makes it feel especially luxurious. I’m loving my RH knock-off!
Tune in this week for a few fun projects we are working on as well as a few painting projects completed by our son at his new house! Meanwhile, stay safe friends and we’ll chat again soon. xoxo Dell