
Welcome to Throw Back Thursday, friends! If you’ve followed along from the beginning, you will remember the master bathroom renovation my husband and I did in our last house. You know how bloggers do a one room challenge these days? And it takes them 6 weeks to complete? Well, this one took us nearly a year! In case you missed it, here are the highlights!
My husband Brad and I have grand ideas sometimes. Mostly about what falls within our pay grade when it comes to our abilities. But, we jump in with both feet and figure it out along the way. We talked about renovating this bathroom for years, so when we started, we had NO idea what we were getting in to. (or how long it would take.) This is where we started with our builder grade bathroom. Massive and unattractive medicine cabinets, builder grade shower, tile and an oversized soaker tub that took up nearly the entire bathroom. (and no one used.) I did what I could to customize it, but after about 12 years, it was time for an update!

First, I decided the medicine cabinets had to go. Since flush mount medicine cabinets were not possible due to plumbing behind the walls, I had to go with wall mounted cabinets. I chose these by Allen and Roth from Home Depot. They were attractive and affordable and went with our polished nickel theme. I also bought new Restoration Hardware sconces at the outlet in Philadelphia for ⅓ of the price. Score! You can see around this time I was trying to choose a wall color….

I had the electrician center the sconces over the sinks, where they should be, right? Then, we painted the bathroom. Already an improvement, but just like me, to put the cart before the horse…

When it came time to tackle the rest of the bathroom, everything else needed to come out! This was the original shower. I think this may have even been an upgrade. (As if.) The plastic floor of the shower was beyond cleaning and the grout was in sad shape. It all had to go.

Also, the oversize soaker tub was definitely coming out. See how it took up SO much room? Suffice it to say, removing all of the old tile was a huge and back-breaking undertaking! We tried to give the tub away on Facebook Marketplace, but we had no takers. Sadly it went in the dumpster.

Then, demolition began in earnest on this side of the room. Once the old tile and sheet rock were removed, it was a mess. A big mess! Repair work on the walls took a while, but my husband did all of this himself. (along with his trusty assistant/gopher, me.)

Once the repairs were made, my husband rebuilt the framework of the bathroom walls and floors. We made the walk-in shower larger and left room for a future claw-foot tub.

Once the sheet rock was installed, the floor was laid. We chose a 12″ x 12 ” Carrera Marble tile for the floor. It was very pretty, but in hind sight it is slippery when wet, so keep that in mind when choosing your flooring.

After the floor tile was installed, Brad added a chair-rail and picture frame moulding to the room and we painted it semi-gloss white to match the rest of the trim.

We ordered a new glass surround for the shower and used marble subway tile for the walls. The enclosure was probably the biggest ticket item in the room. But it turned out great!

For the floor of the shower we chose a coordinating tile in a herringbone pattern. Also, live and learn, this was a little hard on the feet so I wouldn’t use it again on a shower floor.

We hired out the tile installation, mainly because my husband was still working and traveling and simply didn’t have time. But, we did save money elsewhere.

For instance, I painted the existing vanity cabinets and hardware.

I found this chandelier at a consignment store for $50. I loved its large size and scale. It was brown with amber-colored crystals. So, I painted it Titanium Silver and replaced the amber crystals with clear ones. It looks like it would have cost a fortune! Sadly, this one had to stay, but for $50, I’m not too sad about it.

The DIY moulding adds a nice finishing touch and gives the room some texture. The claw foot tub turned out so pretty, but it is acrylic and not cast iron. Also a huge cost savings! The tub and hardware were around $1100.
 The claw-foot tub turned out to be the show stopper in the room! I’m not really a bath taking girl, but I do love a beautiful tub!

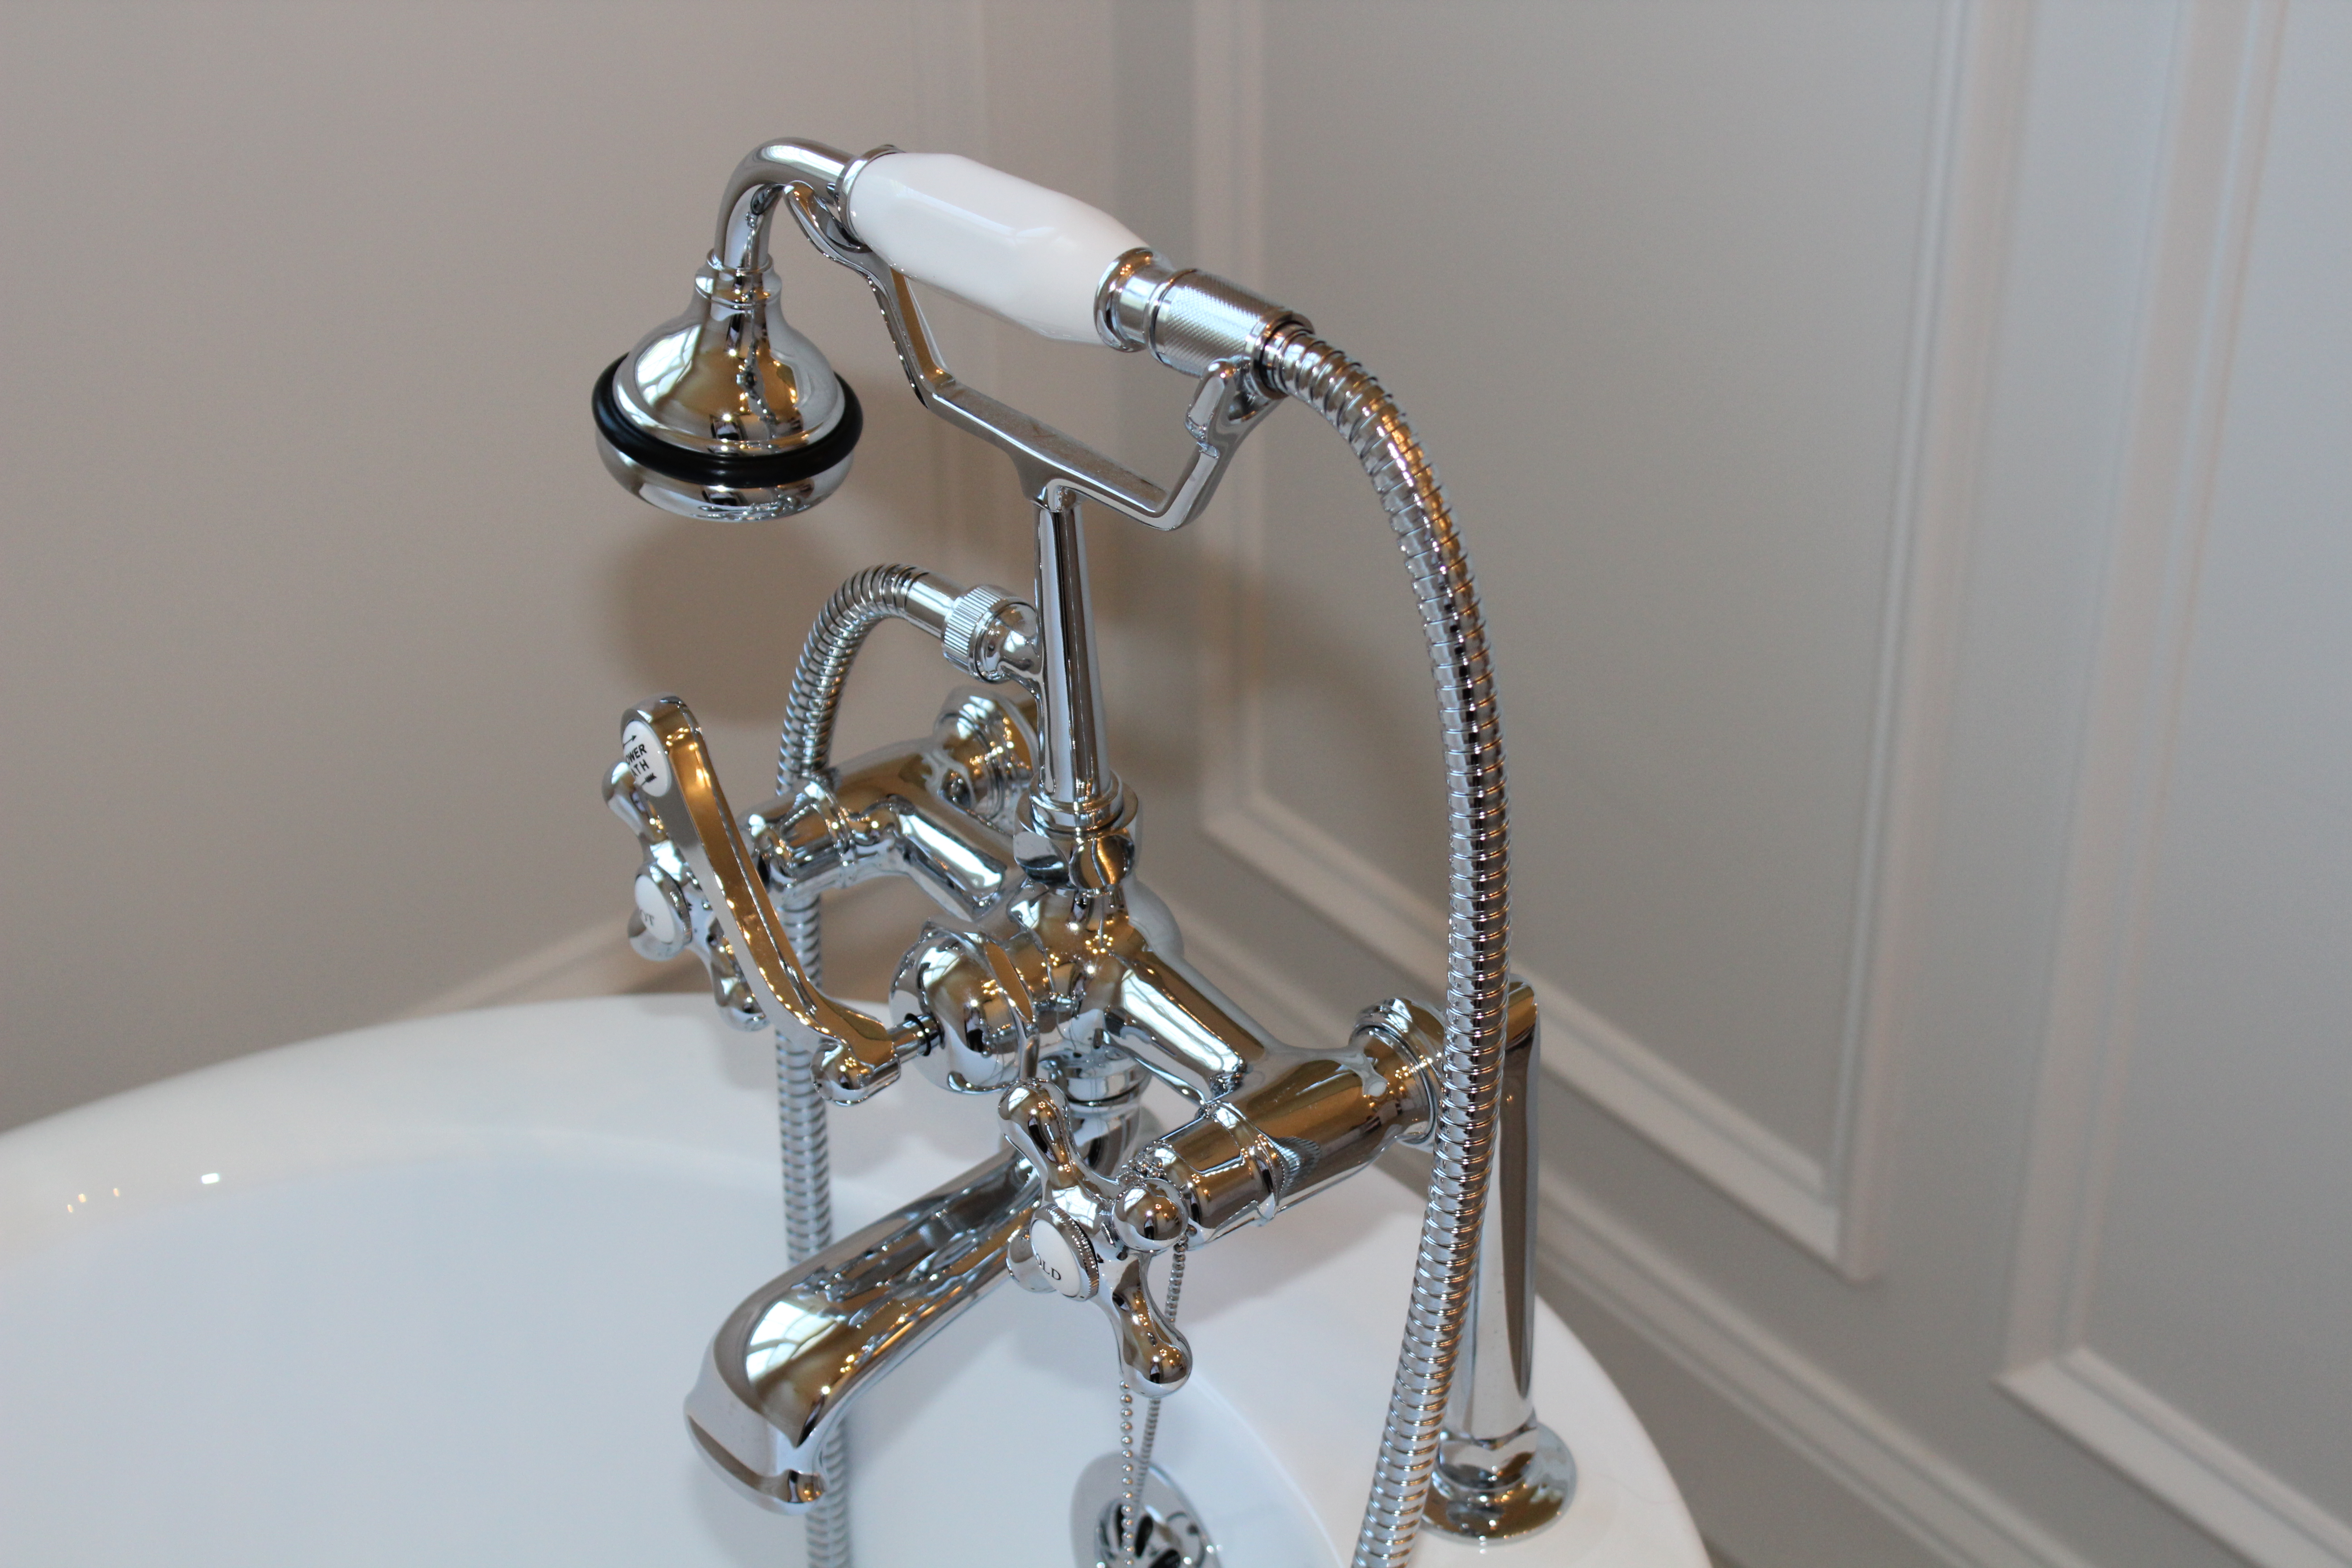
The tub hardware is so pretty! I still love it!

By doing most of the work on this renovation ourselves, we saved BIG bucks!! We kept the original footprint of the bathroom which was also a huge savings. This makeover took us around 9 months, due to the fact we were doing it on the weekends as time allowed. But well worth our efforts! And we got to enjoy it for a few years before we moved! I really think this bathroom helped sell our house quickly. We got an offer within 3 days of putting it on the market!

So, my advice to you if you are thinking about renovating a bathroom, is you can do it! (At least the demolition portion.) We figure we spent around $20,000 or so on this entire master bathroom renovation. We used high-end materials, but waited until they were on sale and then price shopped for contractors where we needed them. Plus, by doing the renovation slowly, we paid for everything bit by bit so it wasn’t a huge budget breaker all at once. Had we hired this project done it probably would have been around 50-60 thousand dollars!! Yikes!
Well, speaking of bathroom renovations, our new guest bath is nearly complete! To see more of the guest bath see here: Bathroom Makeover! Also, be sure to check out the blog to see the latest projects in our new home. You can follow me on Instagram and Facebook, too! Thank you for stopping by today and have a great day! xo Dell